Welcome to our complete guide on making and sending newsletters in Magento 2! In today's digital age, newsletters are super important. They help us talk to our customers, show off our cool products, and boost sales. Luckily, Magento 2, this amazing online store platform, gives us all the tools we need. With its awesome features, making and sending eye-catching newsletters to our subscribers is a breeze. Let’s go through it together, step by step. We’ll show you how to create your newsletter and set up your campaign, making sure it reaches all your customers successfully. So, are you ready to dive in and become a newsletter pro? Let’s get started!
 The template creation form will show up, and you'll personalize it in the following way:

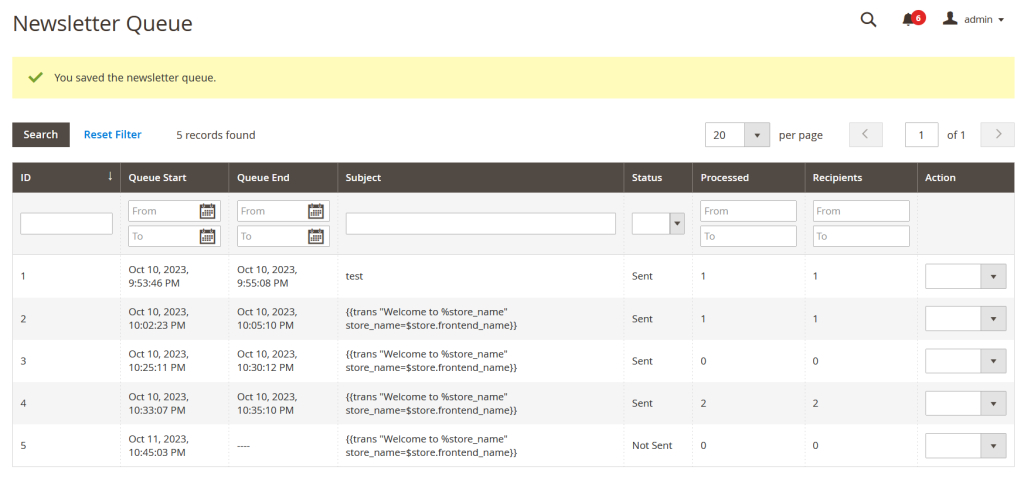 On this page, you'll find comprehensive details about the newsletters in the queue. If the newsletter is in "Not Sent" status, you can still make edits.
Once the scheduled time arrives, the newsletter will be sent out. Please note that sending might take a few minutes, so please be patient if it doesn't go out immediately.
On this page, you'll find comprehensive details about the newsletters in the queue. If the newsletter is in "Not Sent" status, you can still make edits.
Once the scheduled time arrives, the newsletter will be sent out. Please note that sending might take a few minutes, so please be patient if it doesn't go out immediately.
How to Make Newsletters in Magento 2
Crafting newsletters in Magento 2 enables you to create strong communication links with your customers, showcase your products, and boost sales. Thanks to Magento 2's robust features and easy-to-use design, making these newsletters is incredibly simple. Let's delve into the essential steps for creating newsletters in Magento 2.Step 1: Entering the Newsletter Templates Management
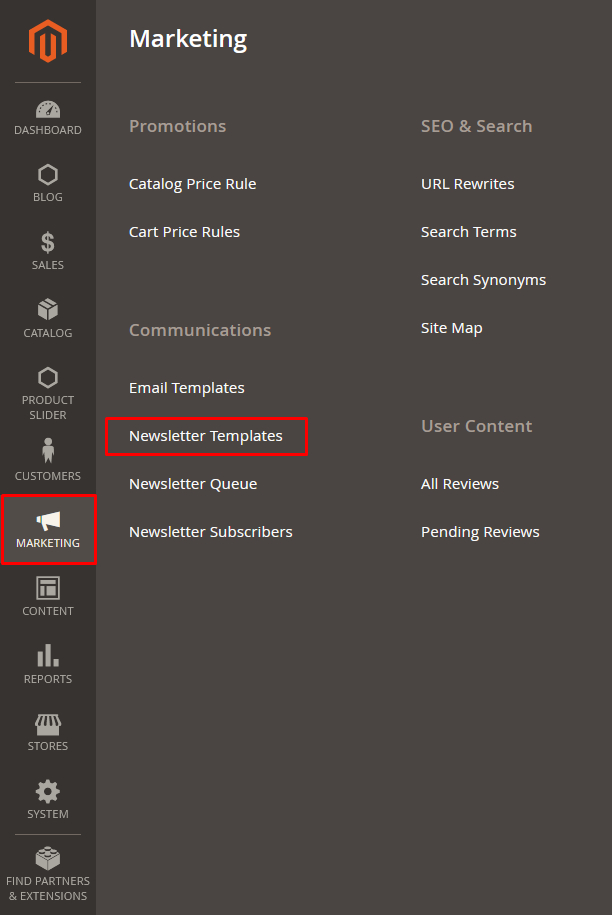
To start making newsletters in Magento 2, follow these instructions to enter the Newsletter Templates management:- Sign in to your Magento 2 admin panel.
- On the admin dashboard, go to "MARKETING -> Newsletter Templates".
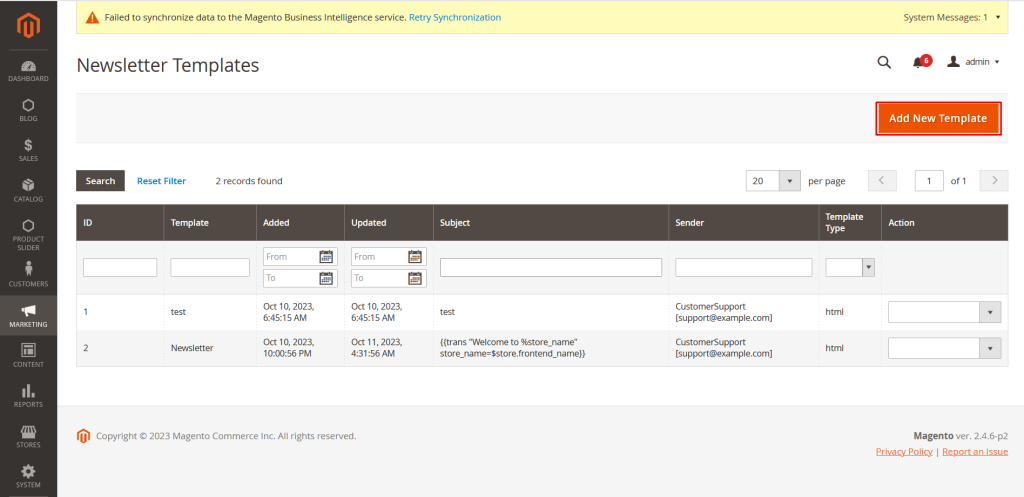
Step 2: Create Newsletter Template
Within the Newsletter Template management panel, click on “Create New Template.”
The template creation form will show up, and you'll personalize it in the following way:
- Template Name: Provide a name for your template.
- Template Subject: Compose the subject for your template, which will also be the subject of the email newsletter sent to customers.
- Sender Name: Input the name of the email sender.
- Sender Email: Specify the email address from which this form will be sent.
- Template Content: This is where you create the content for your newsletter template. You can use the wysiwyg editor, add widgets, images, and variables. Additionally, you can choose to Convert to Plain Text or Return HTML Version to change the text format.
- Template Styles: This field allows you to add style codes to enhance the attractiveness of the template.
Also Read: https://www.evrig.com//blog/how-to-install-extensions-in-adobe-commerce-magento-2/
Establish and dispatch newsletter campaigns to your subscribers.
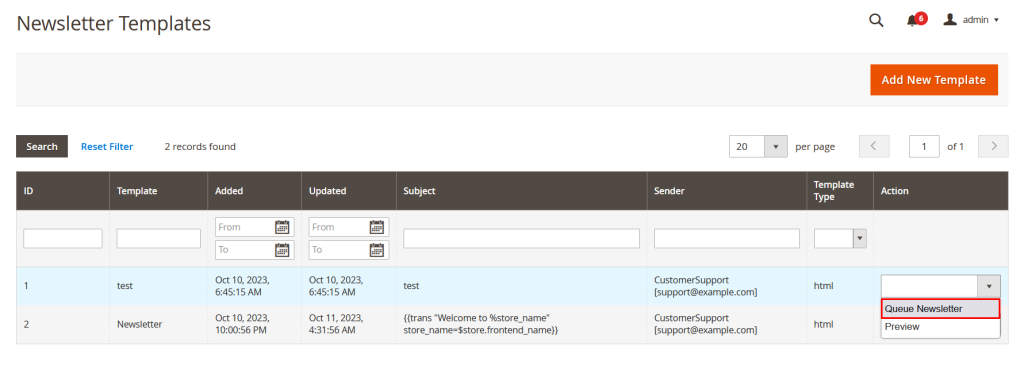
Step 1: Add the newsletter to the queue.
On the Newsletter Template management page, choose the template you wish to send and click on "Action -> Queue Newsletter".
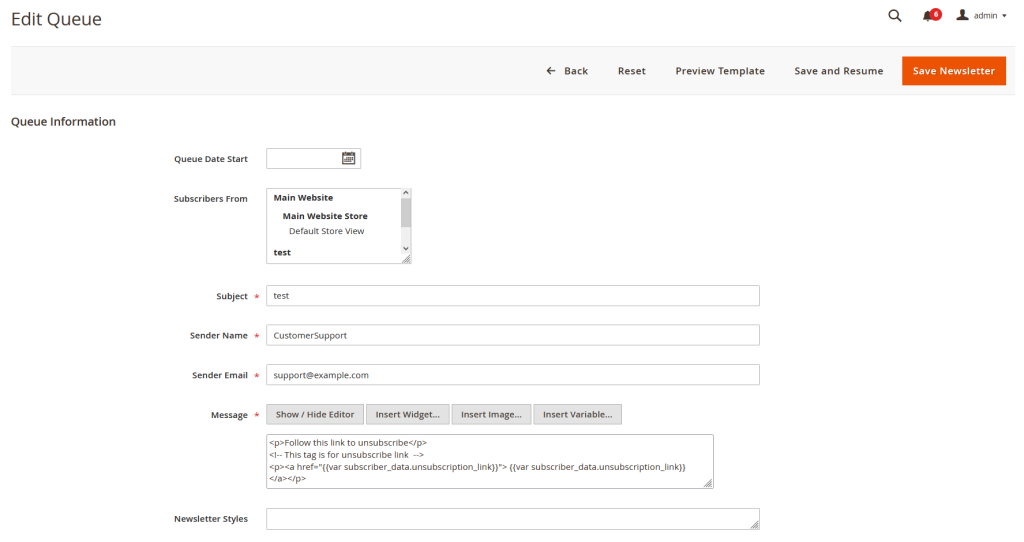
Step 2: Arrange and dispatch the newsletter.
Once you finish step 1, the Queue Newsletter setup form will pop up, enabling you to personalize everything before sending.
- Queue Date Start: Set the time for the queue. When this time arrives, the newsletter will be automatically sent to subscribers.
- Subscribers From: Choose the group of subscribers from one or more websites you want to send the newsletter to.
- Subject: Adjust the subject according to your needs.
- Sender Name, Email: Change the sender's name and email address, but you can skip this if it's not necessary.
- Message: Modify the content of the newsletter to be sent, if needed. This content will be sent to subscribers without replacing the original template.
- Newsletter Styles: Add style codes as per your requirements.
On this page, you'll find comprehensive details about the newsletters in the queue. If the newsletter is in "Not Sent" status, you can still make edits.
Once the scheduled time arrives, the newsletter will be sent out. Please note that sending might take a few minutes, so please be patient if it doesn't go out immediately.